Showing posts with label Recycle-Repurpose. Show all posts

Aug 9, 2016

DIY Notepad Cover - Recycle, Reduce, Repurpose


I am definitely a "SHE" - 
Sidetracked Home Executive (via Flylady)!
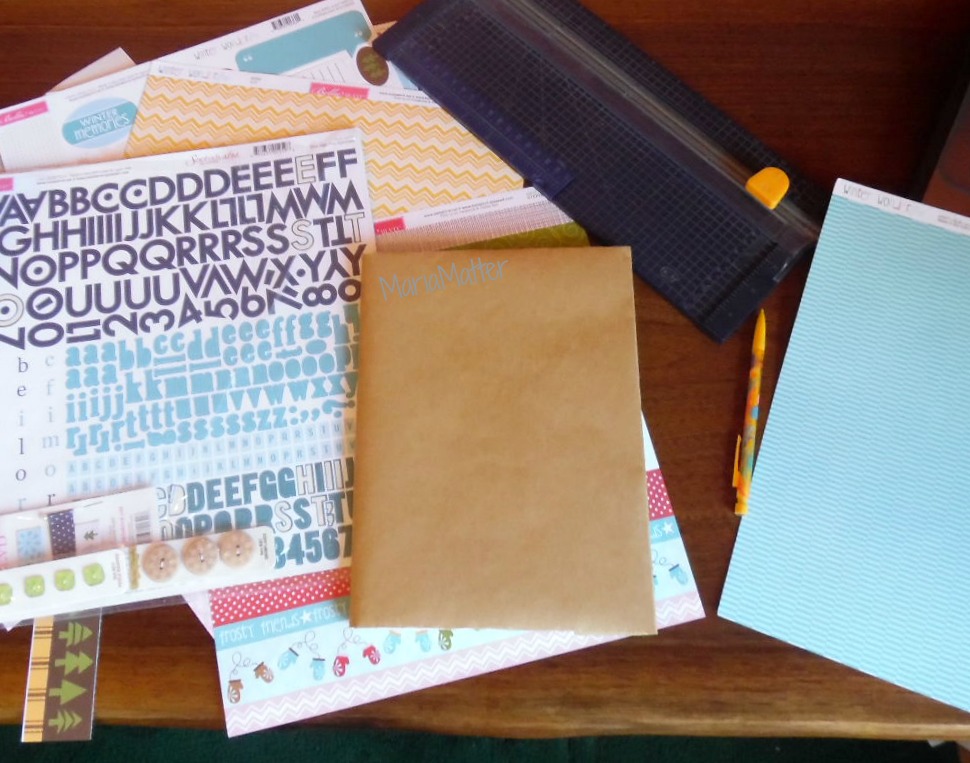
Stationery supplies make my heart happy; 
notebooks, journals, papers, pens, markers, 
file folders, planners, etc.

So when hubby & I went to some local 
yard sales this past weekend and I saw 
a fellow "SHE" selling a portion of her 
stash, I was like...


Then during a little crafty time, 
I created a pretty cover for one
of the notepads I had picked up.


These lovely papers are from Echo Park,
For the Record, they were in my scrap
box along with their stickers & trim.

However, the scraps weren't quite wide
enough to cover my pad so I pieced some
together. It worked out perfectly with a
little washi tape to hide things inside! (:


I even found a little 
resin flower to match!


I now have a pretty covered 
notepad for my purse...


I like when everything coordinates!!


check out the one
I created for my


Are you a SHE?


scroll down to see where I'll be sharing today's post.

Jul 19, 2016

Simple, Sparkly and Recycled - Birthday Card


Recycle, ReUse old cards, cardmaking


A few months ago, my son
received this cute birthday 
card below.

It was bright, fun and sparkly.

And honestly, it was the sparkly
parts that saved this card from
the bin when he was finished with it.


So, with a piece of white cardstock
and a trimmer, a new birthday card
was born. Simple, huh?!


Can you see the sparkly glittery parts???  
Oh my heart be still! (: 


Recycling cards, Happy Birthday
white cardstock, personal trimmer, foam dots


"So that which is old becomes new."

Works great for Christmas cards too!
Enjoy your day!


What do you do with
your old birthday cards?


scroll down to see where I'll be sharing today's post.

Apr 22, 2016

My TO-DO List Altered notebook - Bella BLVD

Happy Earth Day!

Here's a fun little recycle/upcycle - reuse
project I've been wanting to share.


I am an admitted list-maker, yep, it's right there
on my "About Me" page! Lists are a constant in
my life. 

My mind naturally works in lists.
When I have a project to do, I see the steps in
list form before my pen even hits paper.

So where does a prolific list-maker keep her lists?
Notebooks!


altering a notebook, recycle, my to do list notebook

But I'm a crafter too, so they need to be
embellished notebooks!

I make one for each season. (:

notebooks - Summer '15 & Winter '16

Recycling or is it Upcycling?

I use the kids old composition books; they 
never use all the pages. Would that be 
recycling or upcycling?


Upcycling the kids old notebooks.
The used pages are carefully cut out and
the cover is joyfully altered.


Most notebooks have more than half of
their pages unused, in that case I just 
alter the cover. 

However, my current edition was pretty
much thinned out so I made a quick 
bookcover from kraft wrapping paper.
This will allow me to transfer my spring 
cover to another book when this one
is finished before the end of the season.


creating a kraft paper book cover


Ironically, some of Bella Blvd's winter papers 
were perfect for my spring notebook!


Bella Blvd Winter Wonder design papers were
used, earlier in the year, for both my winter notebook 
and my 2016 daily planner, I really liked the color scheme.


Winter '16  with Bella Blvd design papers


My 2016 daily planner using Bella Blvd Winter Wonder papers


spring 2016 To-Do list notebook

Are you a list-maker?
Do you keep notebooks of notes?


For more fun projects...
Follow on Bloglovin


scroll down to see where I'll be sharing today's post.

Apr 11, 2016

Springtime Centerpiece - Chicken Wire Flower Cage

Spring has sprung!
So I thought it appropriate to dust the 
cobwebs from my blog and say HELLO!


forsythia bush


This past winter season was a busy one
in our home, more on that later but I
wanted to share my first spring project
with you.


A Chicken Wire Flower Cage

recycled bottles wood and chicken wire for a springtime flower centerpiece
centerpiece using  recycled bottles

My original idea was to place
single stem flowers in plain 
clear bottles spaced across my
table. Cute idea, right?

Turns out it was not very practical 
once I needed to move them every
evening for meal time. So hubby 
made me this sweet chicken wire cage!


So simple but I'm lovin' it!
general materials used:
soda/beer bottles, labels removed.
flower bouquet (Walmart $3.00),
 snipped to separate stems.
scrap wood.
chicken wire.


*side note...we have a very long
farm table (nine foot long) so I
needed at least seven bottles to
make the piece look right. If you
have a normal size dining room table,
and you wanted to make a similar
centerpiece you could probably get
away with using only 3 to 5 bottles.

springtime centerpiece chicken wire flower cage recycled


Sweet & Simple
What do you think?


Follow on Bloglovin


scroll down to see where I'll be sharing today's post.

Sep 17, 2015

Encourage your kids to Talk about their day!


"Tell me something awesome about today!"

That is a question I asked my kids 
at the end of every day when they
were young!

It opened the door to many wonderful
conversations and I was able to "see"
into the hearts of my precious little ones!

creating memories, recycled, reuse, repurpose, homeschool, encouraging conversation
recycled cardboard box, Washi tape,
Echo Park papers (For the Record)
Joy's Life stamps (My Hero)


With school starting, this would be a great way to encourage your children to talk about their day with a positive attitude.

"Tell me something awesome about today."

Let them think for a minute, 'good thoughts,' then jot it down on an index card or let them write it out if they're old enough.  

(helping the teacher pass out papers, encouraging a friend, sitting beside a lonely child on the bus, etc.)


Date it (month, year) and file it under the number date (1-31). 
You'll be creating a beautiful memory file over the years!

Record a Day file box - divider cards

Using my paper scraps, I created divider cards with number stickers and my Joy's Life, My Hero stamp set; so many encouraging sentiments!


The file card box was made with a re-cycled beverage box!


How do you encourage a positive attitude 
in your children?


Follow on Bloglovin


scroll down to see where I'll be sharing today's post.

May 22, 2015

From Cookies to Muddy Boots - DIY Drying Rack

My "About Me" page claims that I re-cycle, 
up-cycle and repurpose for the sheer joy of it. 

Here's my latest joy...

We've all seen the boot drying racks with 
pretty stones, rocks or pebbles in a pan on 
Pinterest, right?

So pretty, yes, however, every time you want 
to clean out all the accumulated mud & dirt you 
have to dump out all the stones, wash them and 
let them dry a bit before putting them back in the pan.

Not very practical for this country girl.

Recycle Cookie Baking Sheets, DIY Boot Drying Rack

I needed something I could rinse off  easily 
with my hose and put back in place before 
the muddy boots started arriving again!

So here's my solution; old cookie sheet, 
cooling rack and pretty spray paint.

The cooling rack is easy to rinse & dry and 
allows maximum air flow for muddy/wet boots.


Honestly, I did not over think this too much, 
so it was a really quick project. 
I did not "prepare" the baking sheets in any way 
prior to painting. We've been using them now for 
over two months. Works perfectly! 


Follow on Bloglovin

Have you used the pebble/stone drying racks?
Do they work for your family?


scroll down to see where I'll be sharing today's post.

Oct 13, 2014

Mirrored Vanity Tray - Recycle, Repurpose, Reuse

We recently gave our bedroom a major makeover 
and now I'm working on adding some pretty decor.

When we decluttered our home earlier this year, 
I boxed up a few items and challenged myself 
to recycle, repurpose or reuse them within the 
year in order for them not to be deemed 'clutter'! 

So, here's my first ready-to-see project: 
An old gold framed mirrored tray.

mirrored vanity tray - before

A bit of cleaning, a solid coat of black Krylon spray paint, 
and some Zva Creative bling...

a little mirror bling

...and here's my "new" mirrored vanity tray! 

mirrored vanity tray - reuse

Hubby made us his & her oak dressers; 
this tray will be sitting pretty atop mine!


I'll have more projects to show soon, 
along with the room makeover!

Follow on Bloglovin
♥ Follow Me On Bloglovin'

What's your latest 
recycle-repurpose-reuse project?


scroll down to see where I'm sharing today's post.

Sep 13, 2014

Organizing Life - Brain Dumping!

Like my computer browser, at times, my 
brain can have too many tabs open!

There are so many things I want to learn, 
books and articles I want to read, sites I 
want to check out, crafts I want to make, 
people I want to contact, recipes I want to 
try, the list goes on and on. 

I'm a visual person, so trying to keep it all
in my head just doesn't work.

So...I use this little system I like to call
Brain Dumping!


brain dumping with my calendar and one of the kids old school notebooks.


I use my calendar & a notebook.
yep, it's quite old-school but it works for me.


It all goes down on paper, no more
cluttered thoughts. When something
comes to mind, I jot it down. I also sketch
ideas in my notebooks along with some
doodles to highlight certain entries.

I would say brain dumping is one of my
main keys to enjoying a simplified life! 

How do you empty your brain?

Follow on Bloglovin
♥ Follow Me On Bloglovin'

Also, be sure to follow me on Pinterest 
where I keep all my online finds!


scroll down to see where I've shared today's post.

Sep 6, 2014

DIY Cake Plate - some assembly required

I've been wanting to create a pretty 
pedestal cake plate for the upcoming 
holidays for some time now. So at the 
beginning of yard sale season, it was on my list.


I found a lovely glass candle holder, it was 
a bit bigger and heavier than the regular 
ones I normally see, it was two dollars at a 
tag sale, perfect! 

DIY cake plate - some assembly required

With a little glue and a glass plate found at 
Goodwill, I was able to create this pretty piece!


It sparkles!

DIY cake plate

This is such an easy DIY, I encourage you 
to hunt down some glass pieces of your 
own and make one. 

Don't need another cake plate?  

Then stay tuned, I have a fun & unique way 
to use a pedestal plate as a really cute gift idea!


Follow on Bloglovin
♥ Follow Me On Bloglovin'


scroll down to see where I'm sharing today's post.

Aug 12, 2014

Seashell Candles


seashell candles


Do you collect seashells at the seashore?

seashells

Here's a fun idea to use some shells 
for your outdoor decor.


You'll need:
clam shells
wax 
wicks
clay pot saucer
sand 

I used a pack of tea light candles that I picked up at a tag sale for .10 cents. 

tea light candles, wicks removed

The tea lights were my wax & wicks, the wicks have a tiny metal base and slip right out of the candle. Then I dropped the "wickless" candle into a tin can to melt on the side burner of my grill. 

When the wax was completely melted, I dipped the wicks into the liquid wax and placed them in my seashells to secure them. Next, in went the wax. They cooled in minutes.


saucers with seashell candles


I had more wax then shells so I poured the remaining wax in tin cupcake cups to use as wax melts for another craft at a later time!


wax melts


Simple outdoor decor!


Seashell candle outdoor decor

Do you collect souvenirs from your vacations?
How do you display them? 


Follow on Bloglovin
♥ Follow Me On Bloglovin'

scroll down to see where I'll be sharing today's post.