Showing posts with label The Wood Shop. Show all posts

Jul 13, 2016

my "But for the Grace of God" bench - Home Decor


Quite a few years ago, my eldest son 
(with a wee bit of help from my carpenter husband) 
made me a lovely bench for Christmas.

He left it unfinished so I could 
paint it to match where ever I 
wanted to use it...so sweet.


It's a beautiful bench, buttery smooth
and I debated whether to just leave it
as is.

Then I was inspired...

Keith Urban 2016
by a Keith Urban song, 
It was a #1 hit back in 2001
but it's one of my favorites
from him.


I originally used my Cricut to 
cut out a stencil but had major
issues with placement and paint
getting underneath it...what a mess.

So I pretty much free-handed it.
Sketching the letters with pencil,
painting with acrylic then using a 
sharpie marker to even out where 
my hand was unsteady. whew!


Determination always succeeds!


Hope you're having a great day.
Blessings!


scroll down to see where I'll be sharing today's post.

Jul 5, 2016

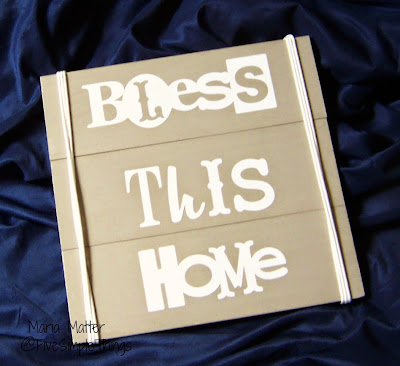
Cricut Wall Art - Bless This Home - Cutting Vinyl


Playing with my beloved Cricut, 
I made this fun little vinyl sign
the other day.


simple Bless This Home vinyl sign


I had cut out this phrase some time
ago when the Cricut Craftroom had
it for free. (It's now available HERE
for $1.99)

The three boards were cut at 3.5"x12.5"
then glued and stapled together.
After my acrylic paint dried, I placed
the vinyl and made sure there were 
no air bubbles. 

The vinyl on the paint is "moveable"
at this point using transfer paper if
you need to adjust it but be careful.

I then painted a thin coat of Mod Podge
over it, left it dry overnight and wrapped
the cord around three times. The cord
is knotted in the back and stapled down.


Note: 
when cutting vinyl on your Cricut,
your blade should be at 3 and the 
pressure at medium.
(I used my Cricut Expression)

simple Bless This Home vinyl wall art


Do you use an
electronic cutting machine
for you DIY projects?


scroll down to see where I'll be sharing today's post.

Apr 11, 2016

Springtime Centerpiece - Chicken Wire Flower Cage

Spring has sprung!
So I thought it appropriate to dust the 
cobwebs from my blog and say HELLO!


forsythia bush


This past winter season was a busy one
in our home, more on that later but I
wanted to share my first spring project
with you.


A Chicken Wire Flower Cage

recycled bottles wood and chicken wire for a springtime flower centerpiece
centerpiece using  recycled bottles

My original idea was to place
single stem flowers in plain 
clear bottles spaced across my
table. Cute idea, right?

Turns out it was not very practical 
once I needed to move them every
evening for meal time. So hubby 
made me this sweet chicken wire cage!


So simple but I'm lovin' it!
general materials used:
soda/beer bottles, labels removed.
flower bouquet (Walmart $3.00),
 snipped to separate stems.
scrap wood.
chicken wire.


*side note...we have a very long
farm table (nine foot long) so I
needed at least seven bottles to
make the piece look right. If you
have a normal size dining room table,
and you wanted to make a similar
centerpiece you could probably get
away with using only 3 to 5 bottles.

springtime centerpiece chicken wire flower cage recycled


Sweet & Simple
What do you think?


Follow on Bloglovin


scroll down to see where I'll be sharing today's post.
Jul 28, 2015

HELLO SUNSHINE simple DIY wall art


Hello Sunshine simple DIY wall art using your Cricut


"Some days you just have to create 
your own sunshine!" 


This little gem hangs in the kid's bathroom 
to bring a wee smile each morning.


Hello Sunshine simple DIY wall art


Hubby made this 5x5 inch wooden base 
with a lip to frame my little creation. The 
design paper was cut to size for the background. 
I used my Cricut (electric die-cutting machine) 
to cut out my sunshine image, stamped the 
sentiment and hung it on the wall!

You could easily use a piece of scrap wood 
or a store bought canvas to make this project, too. 


Cricut - Accent Essentials cart.
Joy's Life stamps (Pun in the Sun)
My Mind's Eye Citron background paper & yellow scraps
Mod Podge,  adhesive & Memento ink (embossed)


This is such an easy art concept, think 
of the possibilities for creating 
coordinated decor for your home.


note: 
My project was photographed before 
giving it a final top coat seal with 
Mod Podge; resulting in a better 
photo without glare.


Do you enjoy creating 
your own home decor?


Want to see more of my
DIY projects?

Follow on Bloglovin
or click the
"Let's Connect"
tab at the top of
the page for more
options.


scroll down to see where I'll be sharing today's post.

Jul 1, 2014

Recycle - wooden block flag - Americana Decor

Hello July!

Summer is in full swing this week,
with it's hot, hazy & humid weather.

As much as I enjoy this season for
gardening, I do not enjoy the heat!
So, for the next two months you will
find me cowering in the air-conditioned
house!

wooden block flag

If you're hiding in the cool air too, 
here's a quick & easy project to make!

A wooden block flag!

You'll need some wood scraps & paint!
I used 2x4's, a 4x4 block and Krylon spray paint.

Or have the kiddos join in 
with their brushes & paint!


wood scraps


These wooden scraps would have
gone into the kindling box for the 
winter if I hadn't rescued them!


wooden block flag 


I made extra white blocks 
to change it up a bit
throughout the seasons!

interchangeable blocks, wooden flag


I have so much fun seeing the 
potential in a piece of "trash" 
and turning it into a treasure!

Do you re-purpose your trash??


Follow on Bloglovin
♥ Follow Me On Bloglovin'


scroll down to see where I'm sharing today's post.
Apr 1, 2014

Wood Slab Table & Springtime Snow


I haven't had much time to 
craft or bake this past week.

We've been stepping up the 
de-clutter process. By the time
we're done, my house should be
almost empty...which sounds good
to me!


surprise snow storm March 30, 2014

We were hit with a surprise snow 
storm over the weekend. The forecast
was for rain, possibly a little sleet.
but wow! We woke up Monday morn
with 2-3 inches of snow.

#soreadyforspring (:

Meanwhile...
hubby's been crafting. 

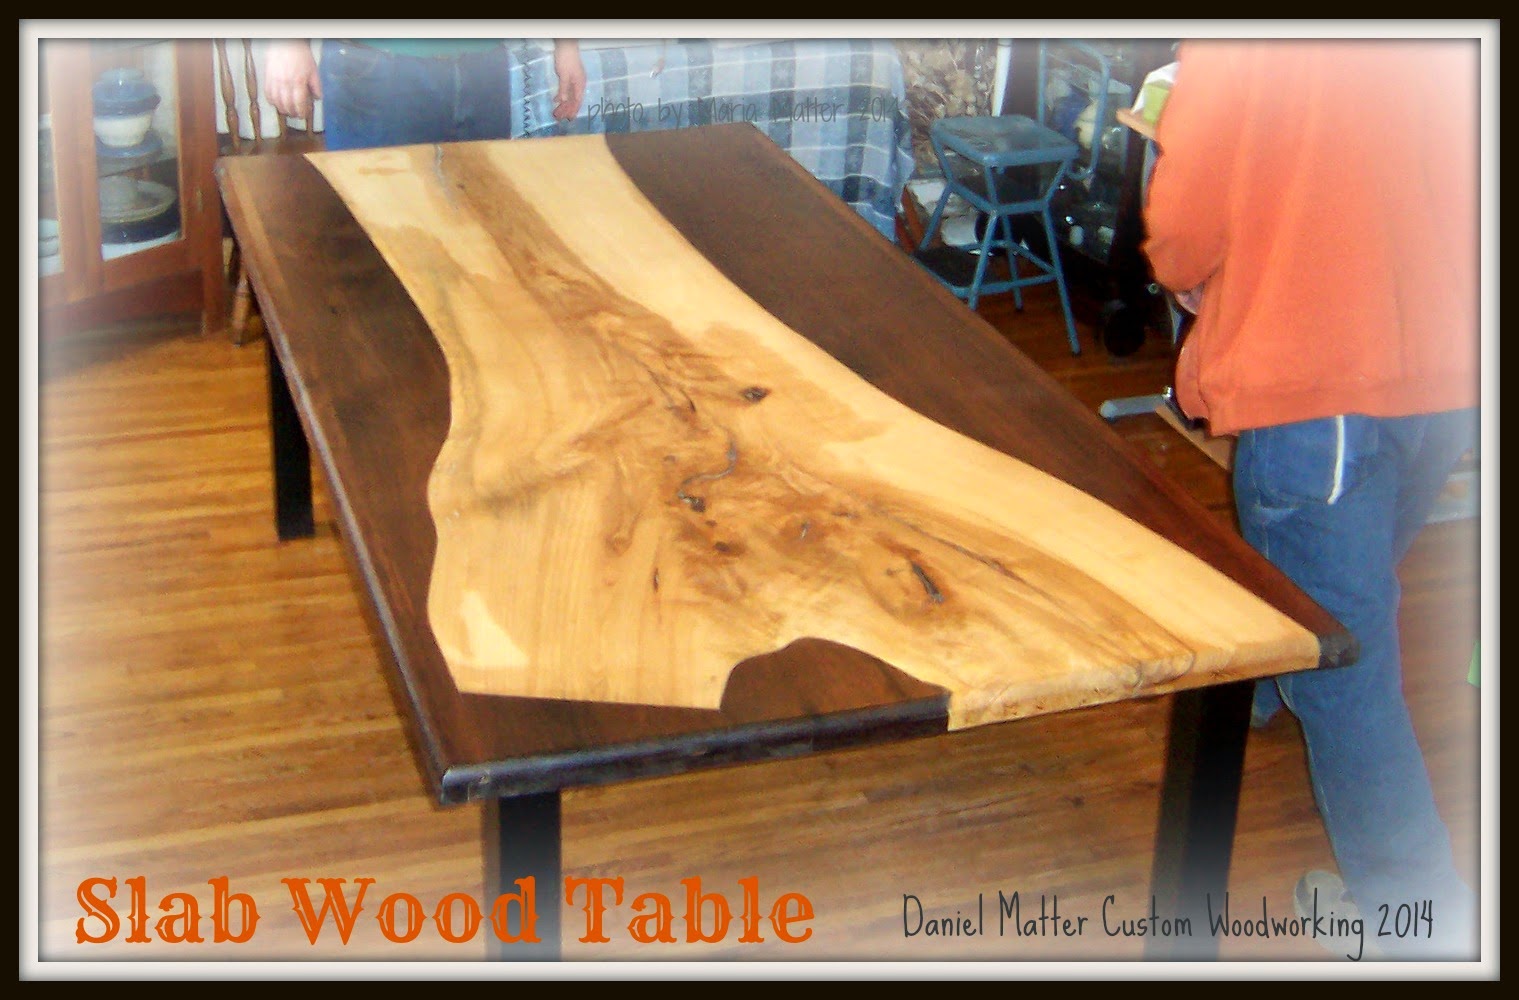
Ash/Walnut slab wood table


Here's a recent slab wood table he created. 
Slab wood can have so much character in its
grain, beautiful.

His furniture is custom made, so it's usually
created & out of his shop before I have a 
chance to snap a few pictures. However,
this one was delivered to a friend's house,
so I was able to capture it.

Thanks for stopping by, 
enjoy your day!


Follow on Bloglovin
♥ Follow Me On Bloglovin'

Dec 4, 2013

4x4 Wooden Block Snowman - Visions Of Sugarplums Day 3

Let's build a snowman!


This frosty fellow stands about 20 inches tall 
and was created with wood scraps.  
Isn't he sweet?!

For those who may be new here, my hubby's a custom woodworker so I have access to a very generous scrap pile!
We created our snowman from a three foot piece of a 4x4 and 
a scrap of  ¾" board.

The 4x4 was cut to varying lengths:
hat = 5 inches
head = 3½ inches
body = 6½, 9, 11½ inches 

The hat rim is a 5½ x 5½ x ¾ inch.


The wood was painted and heavily distressed. The scarf is an old flannel bed sheet, the eyes were hand-drawn and painted with some shiny fabric paint we had on hand. The hat was decorated with ribbon and pieces of silk flowers. His arms were cut from my lilac bush. And his nose was cut from a paint stick.


This post is part of a wonderful blog event 
hosted by Lori from Choux Choux Paper Art.
Please pop over to her blog for all the details
and be sure to leave comments along 
the blog hop trail to have a chance to win some
awesome prizes daily!

Your next hop stop is Lisa!


Follow on Bloglovin
♥ Follow Me On Bloglovin'


Full hop list & prizes for
Wednesday, Dec. 4th:


Giveaways: $10 gift certificate - Paper Sweeties - http://www.papersweeties.com/
                  1 set of choice -  Moonlighting by Mary - http://www.etsy.com/shop/MoonlightingByMary
                  1 set of choice - Iralamija http://www.etsy.com/shop/iralamijashop
                  1 digital set of choice - Vintage Remix - https://www.etsy.com/shop/TheVintageRemix
                  $20 gift certificate  - Nicecrane Designs - http://www.nicecranedesigns.com  
                  Lisa is having a giveaway too!


Dec 2, 2013

Cricut Christmas Wall Art -Visions of Sugarplums-Day 1

From Cricut card to wall art!


The Cricut Craft Room has been generously 
supplying free Christmas cards cuts for their 
users.  When I saw this particular one, I knew
I had to create a wall sign for my foyer.


I liked how they hyphenated the word Christmas,
'highlighting' the word Christ...
the reason for the season!


In the Cricut Craft Room, I enlarged the Christmas card to 
fit my 12 x 12 mat, then cut and used it as a stencil. I measured the area of the stencil I wanted to use and found a piece of scrap wood from hubby's shop and sanded the edges.  I 'pounced' some acrylic paint on it with a contrasting color and that was it.  
Fast, easy & fun!


If you have an electronic cutting machine,
do you use it to create home decor?

Follow on Bloglovin
♥ Follow Me On Bloglovin'


This post is part of a wonderful blog event
hosted by Lori from Choux Choux Paper Art.
Please pop over to her blog for all the details
and be sure to leave comments along the 
blog hop trail to have a chance to win some
awesome prizes daily!

Your next hop stop is Sandy! 

Full blog hop list & prizes for
Monday, Dec. 2nd:


Giveaways:   

$20 gift certificate  - Nicecrane Designs - http://www.nicecranedesigns.com  
                    
1 set of choice -  Moonlighting by Mary - http://www.etsy.com/shop/MoonlightingByMary
                    
$10.00 gift certificate - Paper Sweeties - http://www.papersweeties.com/
                    
1 set of choice -  Springhill Graphics - https://www.etsy.com/shop/SpringHillGraphics


Sep 17, 2013

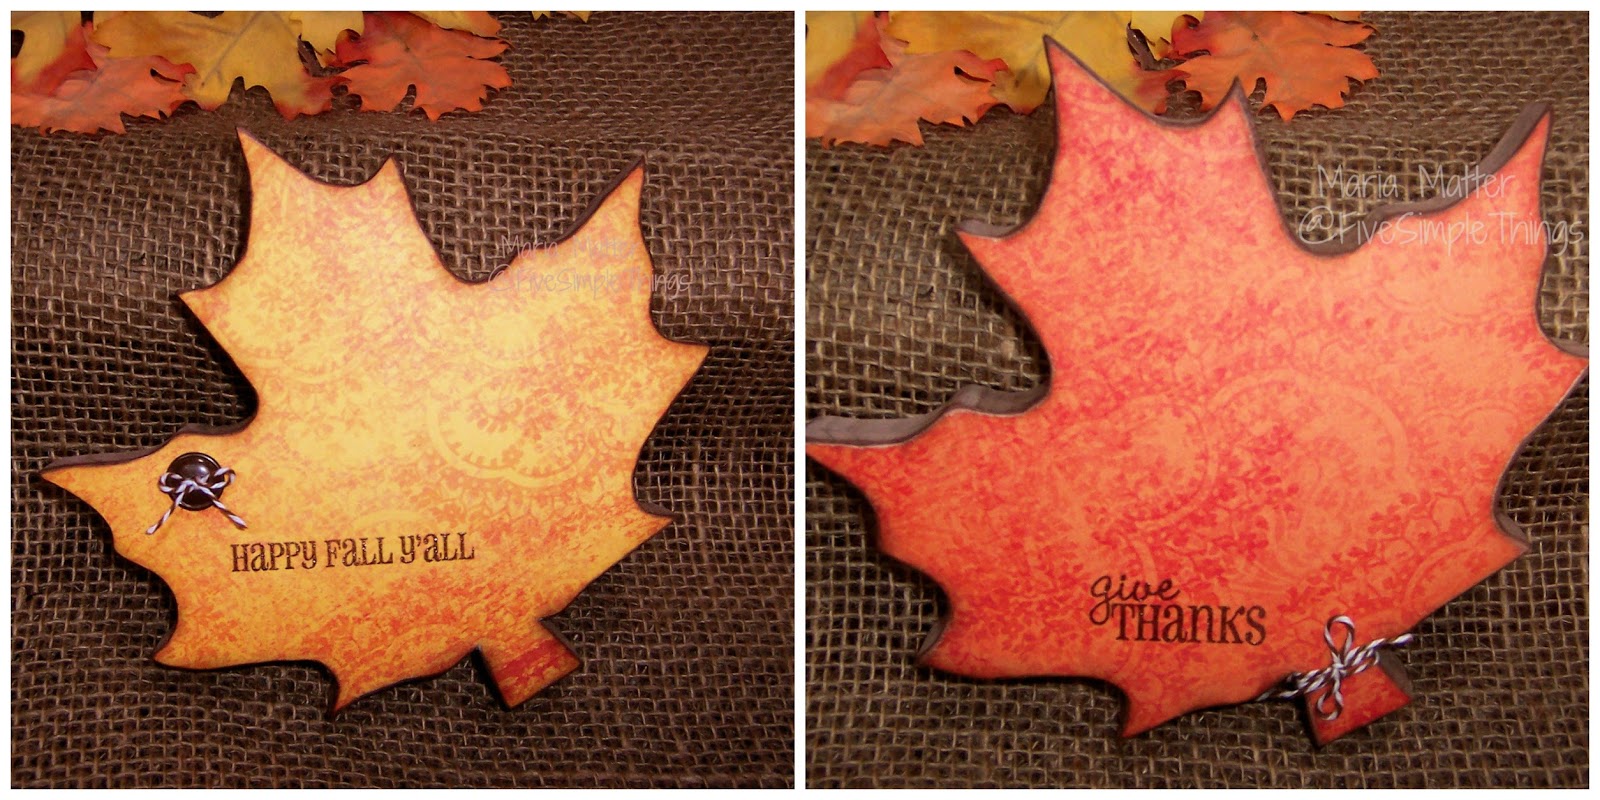
Wooden Leaves - Fall Decor

Time to decorate for autumn!


I've been wanting to include a few more autumn accents in my seasonal decorating throughout the house. When I saw these cute leaves, bingo! I knew I had to make some!

Hubby made me a few maple leaves cut from solid walnut scraps using Martha Stewart's template here. 


I found these beautiful rich tones in my K&K paper scraps (Que Sera Sera 2010).


Trace each leaf for a rough outline pattern to cut. It DOES NOT have to be perfect, you'll be sanding your edges.


Cut & glue down the paper all the way to the edges, smoothing out any air bubbles. (I used Aleene's Tacky Glue)

When the glue dries completely, sand off the excess paper around the edge with a sanding block or some heavy sandpaper.


I used my Joy's Life stamp set, It's All Fall Puns to add little greetings!  Be sure to stop by Joy's blog today, Joy's Life, to check out some great stamping inspiration @ the "It's All Fall Parade!"  


These will look so pretty scattered around the house on tables & windowsills.


Follow on Bloglovin
♥ Follow Me On Bloglovin'