Showing posts with label The Craftroom. Show all posts

Aug 9, 2016

DIY Notepad Cover - Recycle, Reduce, Repurpose


I am definitely a "SHE" - 
Sidetracked Home Executive (via Flylady)!
Stationery supplies make my heart happy; 
notebooks, journals, papers, pens, markers, 
file folders, planners, etc.

So when hubby & I went to some local 
yard sales this past weekend and I saw 
a fellow "SHE" selling a portion of her 
stash, I was like...


Then during a little crafty time, 
I created a pretty cover for one
of the notepads I had picked up.


These lovely papers are from Echo Park,
For the Record, they were in my scrap
box along with their stickers & trim.

However, the scraps weren't quite wide
enough to cover my pad so I pieced some
together. It worked out perfectly with a
little washi tape to hide things inside! (:


I even found a little 
resin flower to match!


I now have a pretty covered 
notepad for my purse...


I like when everything coordinates!!


check out the one
I created for my


Are you a SHE?


scroll down to see where I'll be sharing today's post.

Aug 2, 2016

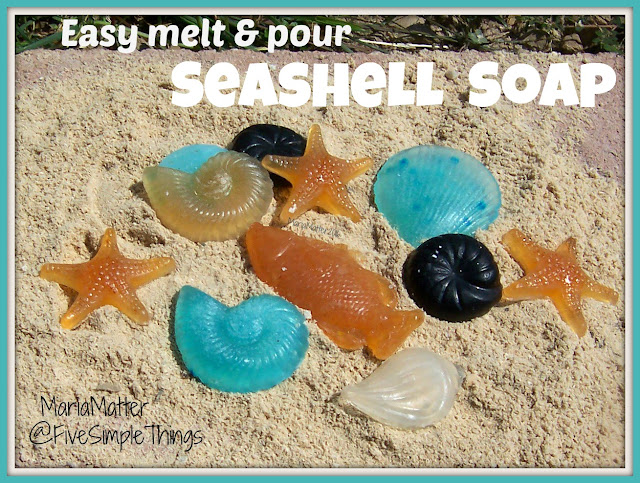
Easy Melt & Pour Seashell Soaps


Ah, summertime...
sun, sand, beach, seashells...seashell soap! 

Why not!

It's a fun activity to do with the kids!


You'll need a melt & pour glycerin bar
and some seashell candy or soap molds
from your favorite craft store.

Then cut a few cubes from the bar and place
them in a glass bowl for melting.

Pop it in the microwave and heat it
for 30 seconds, stir. Continue heating
it at 30 sec. intervals until melted and
its easy to stir.

Separate the melted soap into different
glass bowls if you want to add color to
your soaps.

Once colored, you'll simply pour it into
your molds and let it sit overnight until
firm.

Then pop them out of the molds to use
or give as gifts.

Simple, huh?!

fish, seashell, starfish homemade soap


We used food to color our soaps;
brown sugar, paprika, dark cocoa and 
blue "Jello" powder.


Think of the possibilities...
depending on the molds and colors
you use; you can coordinate seasons,
holidays, sports, special events, etc.


side notes:
if you notice bubbles in your melted
glycerin soap-and they bother you-
you can put a little rubbing alcohol
in a spray bottle and lightly spray the
surface of the soap, the bubbles will
dissipate. 

Also, if you have older kids, this could be
a great fundraiser project. I've given
you the basic instructions, but you 
could get a little more involved by
purchasing soap fragrance and color
gels (a little goes a LONG way!) It can become 
rather addictive, be warned!

make custom made soap


Have you ever made
your own soap?


scroll down to see where I'll be sharing today's post.

Jul 26, 2016

A Baby Giraffe Card - 5 minute cardmaking


How to make a super quick card.
(I used a digital image and a stamped sentiment for this one.)

After I chose an appropriate image
for my card, the process went like this...

1. print 
2. cut to size
3. color
4. attach to card base
5. stamp a sentiment

And in less than five minutes I had
a card. 


This can be an important skill to know
when you completely forget you need a 
card five minutes before leaving the house
for a party, shower or important event...just saying...
Copic markers, foam adhesive squares,
MFT sentiment stamp, Memento ink, white gelly roll pen.

I dotted the blue spots with a 
Sakura white Gelly Roll pen to add
a bit of whimsy but I see they're not
showing up in the photo. {{sad face}}


*side note:
I think this was the last baby card for awhile, I promise. (:
However, if you need more baby card inspiration, click HERE.


Thanks so much for stopping by.
Have a blessed day!


scroll down to see where I'll be sharing today's post.

Jul 19, 2016

Simple, Sparkly and Recycled - Birthday Card


Recycle, ReUse old cards, cardmaking


A few months ago, my son
received this cute birthday 
card below.

It was bright, fun and sparkly.

And honestly, it was the sparkly
parts that saved this card from
the bin when he was finished with it.


So, with a piece of white cardstock
and a trimmer, a new birthday card
was born. Simple, huh?!


Can you see the sparkly glittery parts???  
Oh my heart be still! (: 


Recycling cards, Happy Birthday
white cardstock, personal trimmer, foam dots


"So that which is old becomes new."

Works great for Christmas cards too!
Enjoy your day!


What do you do with
your old birthday cards?


scroll down to see where I'll be sharing today's post.

Jul 13, 2016

my "But for the Grace of God" bench - Home Decor


Quite a few years ago, my eldest son 
(with a wee bit of help from my carpenter husband) 
made me a lovely bench for Christmas.

He left it unfinished so I could 
paint it to match where ever I 
wanted to use it...so sweet.


It's a beautiful bench, buttery smooth
and I debated whether to just leave it
as is.

Then I was inspired...

Keith Urban 2016
by a Keith Urban song, 
It was a #1 hit back in 2001
but it's one of my favorites
from him.


I originally used my Cricut to 
cut out a stencil but had major
issues with placement and paint
getting underneath it...what a mess.

So I pretty much free-handed it.
Sketching the letters with pencil,
painting with acrylic then using a 
sharpie marker to even out where 
my hand was unsteady. whew!


Determination always succeeds!


Hope you're having a great day.
Blessings!


scroll down to see where I'll be sharing today's post.

Jul 8, 2016

A Doodlebug Onesie for Baby - Cricut Craftroom


Welcome to Baby Card Central!
the series continues...


I'm stilling using my Doodlebug Design papers,
they are so sweet! 

Cricut Craft Room basics, Cricut, Memento ink,
Doodlebug Designs paper (Snips & Snails),
kraft paper, button, baker's twine, SU! Congrats sentiment


The Cricut Craftroom offers some 
basic cuts and this is one of my 
favorites for baby making baby 
card making! (:


So many babies, so little time.
I believe I have two more cards
to share; another boy & a girl card
finally. Stay tuned.

More baby card inspiration...


Thanks so much for stopping by.
Have a blessed Thursday!


scroll down to see where I'll be sharing today's post.

Jul 5, 2016

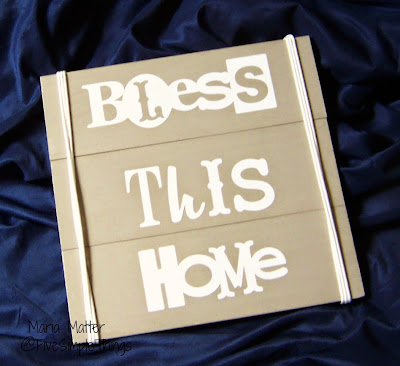
Cricut Wall Art - Bless This Home - Cutting Vinyl


Playing with my beloved Cricut, 
I made this fun little vinyl sign
the other day.


simple Bless This Home vinyl sign


I had cut out this phrase some time
ago when the Cricut Craftroom had
it for free. (It's now available HERE
for $1.99)

The three boards were cut at 3.5"x12.5"
then glued and stapled together.
After my acrylic paint dried, I placed
the vinyl and made sure there were 
no air bubbles. 

The vinyl on the paint is "moveable"
at this point using transfer paper if
you need to adjust it but be careful.

I then painted a thin coat of Mod Podge
over it, left it dry overnight and wrapped
the cord around three times. The cord
is knotted in the back and stapled down.


Note: 
when cutting vinyl on your Cricut,
your blade should be at 3 and the 
pressure at medium.
(I used my Cricut Expression)

simple Bless This Home vinyl wall art


Do you use an
electronic cutting machine
for you DIY projects?


scroll down to see where I'll be sharing today's post.

May 10, 2016

Birthday Cardmaking with My Mind's Eye and Paper Smooches!

Quick morning cardmaking!


When I decluttered my crafting 
supplies, oh my, I found that I 
had somewhat of a paper fetish!

However, with so many designer
paper pads it's quite easy to be
inspired.

For this birthday card, 
MME's Happy Day pad
caught my eye.

Hey Chickie!
a quick birthday card, CAS, Paper Smooches stamps, My Mind's Eye Happy Day papers
My Mind's Eye-Happy Day papers, The Twinery twine,
Paper Smooches-Chubby Chums, Memento ink

So tweet sweet!

Anyone else have 
a paper fetish?
I know I'm not alone on this one! 


Follow on Bloglovin


scroll down to see where I'll be sharing today's post.

Apr 26, 2016

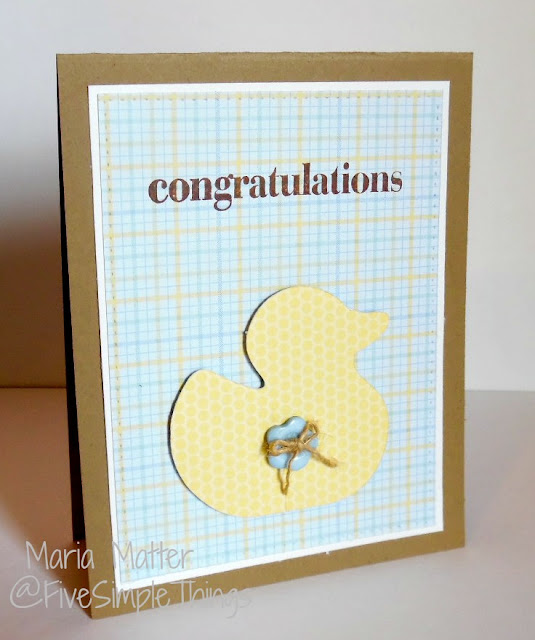
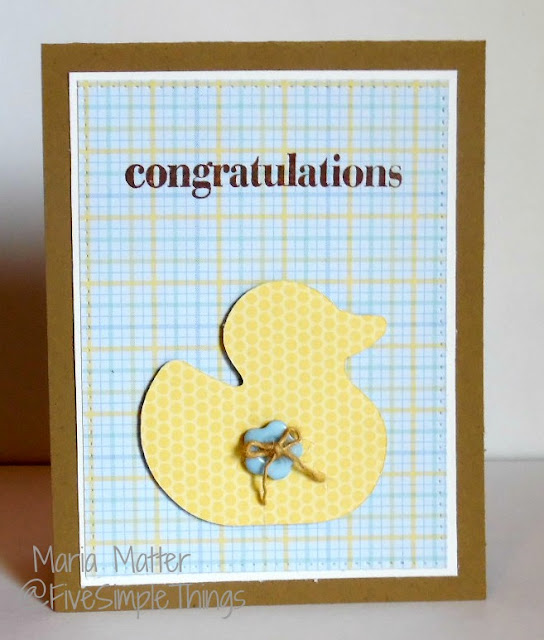
A Rubber Ducky Baby card - Cricut Craft Room

My Doodlebug Designs papers are at it again.
I shared a CAS baby card the other week and
here's the second one in my "baby series!"


baby card using a Cricut die cut duck


This sweet little rubber ducky die cut was made
using my beloved Cricut and a free cart from
the Cricut Craft Room.  


baby card using the free software from Cricut
Cricut Craft Room basics, Cricut, Inkadinkado sentiment stamp,
Doodlebug Designs paper (Snips & Snails),
kraft cardstock, flower button, jute twine


The rubber ducky song kept going through my
head as I was making this card.
Rubber Ducky you're the one,
you make bath time lots of fun...


Congratulations baby card, with Doodlebug Designs paper, Inkadinkado stamps


I hope this post brought a little smile to your face!
Thanks for stopping by, enjoy your day!


This baby card series will 
continue in the coming weeks. (:

Follow on Bloglovin


If you own a Cricut,
have you ever used the free
online Cricut Craft Room?


scroll down to see where I'll be sharing today's post.

Apr 22, 2016

My TO-DO List Altered notebook - Bella BLVD

Happy Earth Day!

Here's a fun little recycle/upcycle - reuse
project I've been wanting to share.


I am an admitted list-maker, yep, it's right there
on my "About Me" page! Lists are a constant in
my life. 

My mind naturally works in lists.
When I have a project to do, I see the steps in
list form before my pen even hits paper.

So where does a prolific list-maker keep her lists?
Notebooks!


altering a notebook, recycle, my to do list notebook

But I'm a crafter too, so they need to be
embellished notebooks!

I make one for each season. (:

notebooks - Summer '15 & Winter '16

Recycling or is it Upcycling?

I use the kids old composition books; they 
never use all the pages. Would that be 
recycling or upcycling?


Upcycling the kids old notebooks.
The used pages are carefully cut out and
the cover is joyfully altered.


Most notebooks have more than half of
their pages unused, in that case I just 
alter the cover. 

However, my current edition was pretty
much thinned out so I made a quick 
bookcover from kraft wrapping paper.
This will allow me to transfer my spring 
cover to another book when this one
is finished before the end of the season.


creating a kraft paper book cover


Ironically, some of Bella Blvd's winter papers 
were perfect for my spring notebook!


Bella Blvd Winter Wonder design papers were
used, earlier in the year, for both my winter notebook 
and my 2016 daily planner, I really liked the color scheme.


Winter '16  with Bella Blvd design papers


My 2016 daily planner using Bella Blvd Winter Wonder papers


spring 2016 To-Do list notebook

Are you a list-maker?
Do you keep notebooks of notes?


For more fun projects...
Follow on Bloglovin


scroll down to see where I'll be sharing today's post.
Apr 13, 2016

A Clean and Simple Doodlebug Baby

CAS baby card, Doodlebug Designs, MFT

A CAS baby card

The end of the world is NOT near!
I just thought I would put that out there today.

How do I know?

Because of the un-naturally high number
of babies being born over the next few
months to friends & loved ones!

With all that new freshness coming into our
world...the world can't possibly be near it's end!


CAS baby card made with Cricut, Doodlebug Designs paper, My Favorite Things stamps
Cricut Craft Room basics, Cricut, Memento ink,
Doodlebug Designs paper (Snips & Snails),
My Favorite Things (DC stamps: notched tags)


CAS (clean and simple) cards are 
definitely my go-to approach to
cardmaking, it fits nicely with
my minimalistic lifestyle!


Doodlebug Designs: Snips & Snails paper 
was perfect for all the baby boys cards I 
crafted; love this monkey print!

Then I used my beloved Cricut and the 
Cricut Craft Room basics cart, available
for free online, to cut my little onesies.

This design would be great for mass 
production but I wanted to get a bit 
creative with each of the cards I made.

Stay tuned for a "series" of baby cards
over the next few weeks!

Thanks for stopping by, have a blessed day!


Follow on Bloglovin


scroll down to see where I'll be sharing today's post.

Apr 11, 2016

Springtime Centerpiece - Chicken Wire Flower Cage

Spring has sprung!
So I thought it appropriate to dust the 
cobwebs from my blog and say HELLO!


forsythia bush


This past winter season was a busy one
in our home, more on that later but I
wanted to share my first spring project
with you.


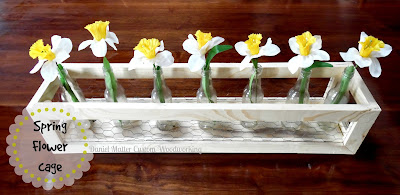
A Chicken Wire Flower Cage

recycled bottles wood and chicken wire for a springtime flower centerpiece
centerpiece using  recycled bottles

My original idea was to place
single stem flowers in plain 
clear bottles spaced across my
table. Cute idea, right?

Turns out it was not very practical 
once I needed to move them every
evening for meal time. So hubby 
made me this sweet chicken wire cage!


So simple but I'm lovin' it!
general materials used:
soda/beer bottles, labels removed.
flower bouquet (Walmart $3.00),
 snipped to separate stems.
scrap wood.
chicken wire.


*side note...we have a very long
farm table (nine foot long) so I
needed at least seven bottles to
make the piece look right. If you
have a normal size dining room table,
and you wanted to make a similar
centerpiece you could probably get
away with using only 3 to 5 bottles.

springtime centerpiece chicken wire flower cage recycled


Sweet & Simple
What do you think?


Follow on Bloglovin


scroll down to see where I'll be sharing today's post.