Showing posts with label Home Decor. Show all posts

Aug 2, 2016

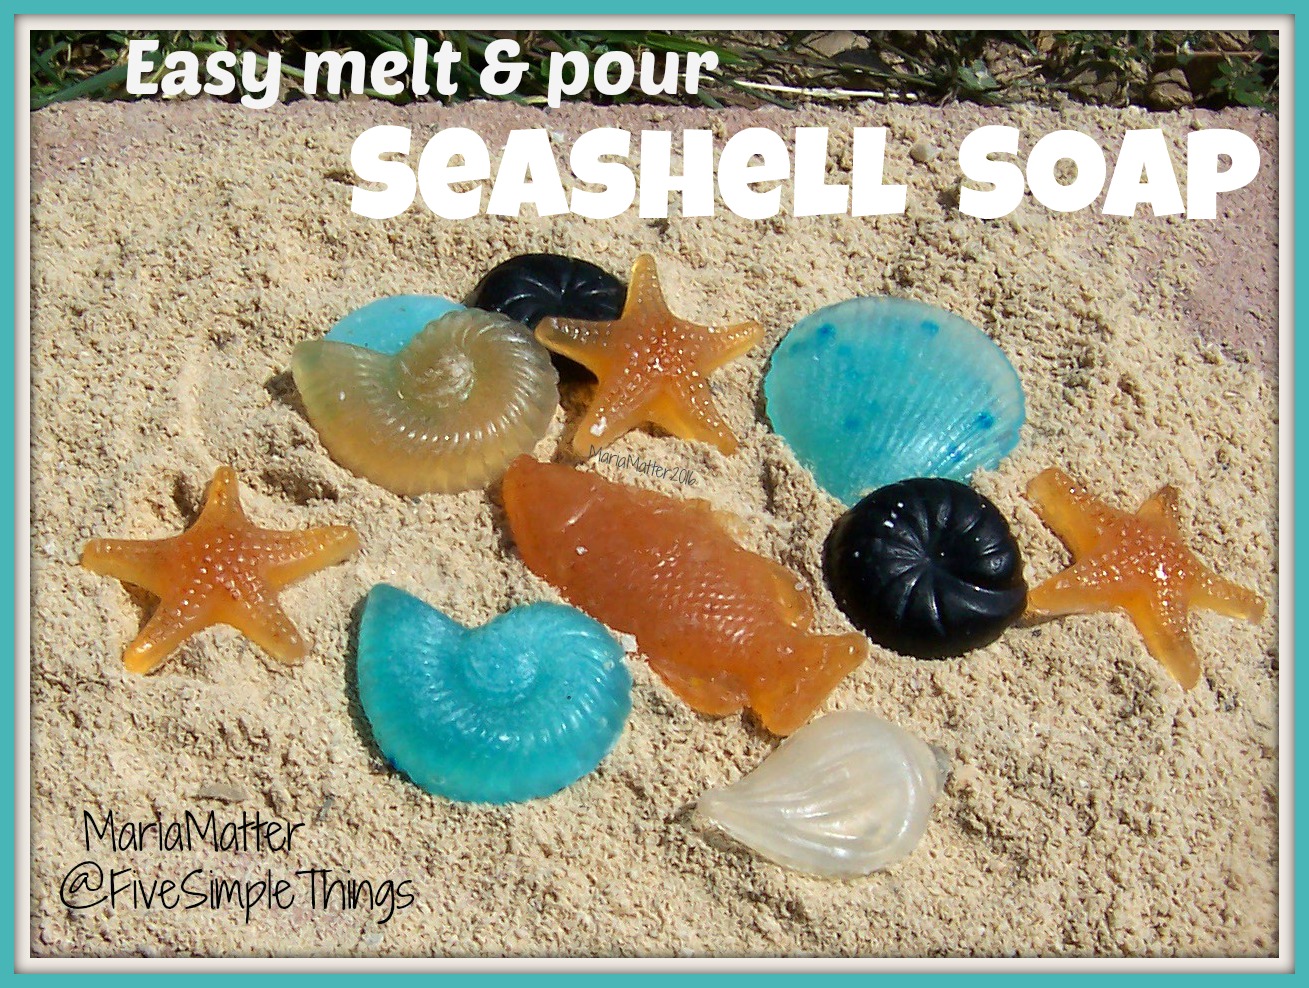
Easy Melt & Pour Seashell Soaps


Ah, summertime...
sun, sand, beach, seashells...seashell soap! 

Why not!

It's a fun activity to do with the kids!


You'll need a melt & pour glycerin bar
and some seashell candy or soap molds
from your favorite craft store.

Then cut a few cubes from the bar and place
them in a glass bowl for melting.

Pop it in the microwave and heat it
for 30 seconds, stir. Continue heating
it at 30 sec. intervals until melted and
its easy to stir.

Separate the melted soap into different
glass bowls if you want to add color to
your soaps.

Once colored, you'll simply pour it into
your molds and let it sit overnight until
firm.

Then pop them out of the molds to use
or give as gifts.

Simple, huh?!

fish, seashell, starfish homemade soap


We used food to color our soaps;
brown sugar, paprika, dark cocoa and 
blue "Jello" powder.


Think of the possibilities...
depending on the molds and colors
you use; you can coordinate seasons,
holidays, sports, special events, etc.


side notes:
if you notice bubbles in your melted
glycerin soap-and they bother you-
you can put a little rubbing alcohol
in a spray bottle and lightly spray the
surface of the soap, the bubbles will
dissipate. 

Also, if you have older kids, this could be
a great fundraiser project. I've given
you the basic instructions, but you 
could get a little more involved by
purchasing soap fragrance and color
gels (a little goes a LONG way!) It can become 
rather addictive, be warned!
make custom made soap


Have you ever made
your own soap?


scroll down to see where I'll be sharing today's post.

Jul 13, 2016

my "But for the Grace of God" bench - Home Decor


Quite a few years ago, my eldest son 
(with a wee bit of help from my carpenter husband) 
made me a lovely bench for Christmas.

He left it unfinished so I could 
paint it to match where ever I 
wanted to use it...so sweet.


It's a beautiful bench, buttery smooth
and I debated whether to just leave it
as is.

Then I was inspired...

Keith Urban 2016
by a Keith Urban song, 
It was a #1 hit back in 2001
but it's one of my favorites
from him.


I originally used my Cricut to 
cut out a stencil but had major
issues with placement and paint
getting underneath it...what a mess.

So I pretty much free-handed it.
Sketching the letters with pencil,
painting with acrylic then using a 
sharpie marker to even out where 
my hand was unsteady. whew!


Determination always succeeds!


Hope you're having a great day.
Blessings!


scroll down to see where I'll be sharing today's post.

Jul 5, 2016

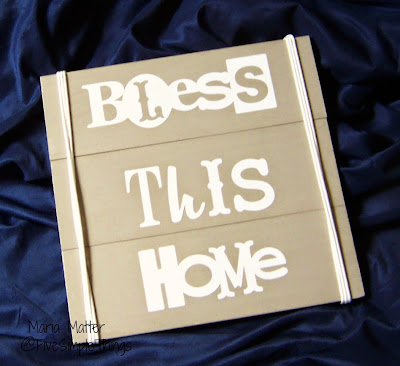
Cricut Wall Art - Bless This Home - Cutting Vinyl


Playing with my beloved Cricut, 
I made this fun little vinyl sign
the other day.


simple Bless This Home vinyl sign


I had cut out this phrase some time
ago when the Cricut Craftroom had
it for free. (It's now available HERE
for $1.99)

The three boards were cut at 3.5"x12.5"
then glued and stapled together.
After my acrylic paint dried, I placed
the vinyl and made sure there were 
no air bubbles. 

The vinyl on the paint is "moveable"
at this point using transfer paper if
you need to adjust it but be careful.

I then painted a thin coat of Mod Podge
over it, left it dry overnight and wrapped
the cord around three times. The cord
is knotted in the back and stapled down.


Note: 
when cutting vinyl on your Cricut,
your blade should be at 3 and the 
pressure at medium.
(I used my Cricut Expression)

simple Bless This Home vinyl wall art


Do you use an
electronic cutting machine
for you DIY projects?


scroll down to see where I'll be sharing today's post.

Apr 11, 2016

Springtime Centerpiece - Chicken Wire Flower Cage

Spring has sprung!
So I thought it appropriate to dust the 
cobwebs from my blog and say HELLO!


forsythia bush


This past winter season was a busy one
in our home, more on that later but I
wanted to share my first spring project
with you.


A Chicken Wire Flower Cage

recycled bottles wood and chicken wire for a springtime flower centerpiece
centerpiece using  recycled bottles

My original idea was to place
single stem flowers in plain 
clear bottles spaced across my
table. Cute idea, right?

Turns out it was not very practical 
once I needed to move them every
evening for meal time. So hubby 
made me this sweet chicken wire cage!


So simple but I'm lovin' it!
general materials used:
soda/beer bottles, labels removed.
flower bouquet (Walmart $3.00),
 snipped to separate stems.
scrap wood.
chicken wire.


*side note...we have a very long
farm table (nine foot long) so I
needed at least seven bottles to
make the piece look right. If you
have a normal size dining room table,
and you wanted to make a similar
centerpiece you could probably get
away with using only 3 to 5 bottles.

springtime centerpiece chicken wire flower cage recycled


Sweet & Simple
What do you think?


Follow on Bloglovin


scroll down to see where I'll be sharing today's post.

Jul 28, 2015

HELLO SUNSHINE simple DIY wall art


Hello Sunshine simple DIY wall art using your Cricut


"Some days you just have to create 
your own sunshine!" 


This little gem hangs in the kid's bathroom 
to bring a wee smile each morning.


Hello Sunshine simple DIY wall art


Hubby made this 5x5 inch wooden base 
with a lip to frame my little creation. The 
design paper was cut to size for the background. 
I used my Cricut (electric die-cutting machine) 
to cut out my sunshine image, stamped the 
sentiment and hung it on the wall!

You could easily use a piece of scrap wood 
or a store bought canvas to make this project, too. 


Cricut - Accent Essentials cart.
Joy's Life stamps (Pun in the Sun)
My Mind's Eye Citron background paper & yellow scraps
Mod Podge,  adhesive & Memento ink (embossed)


This is such an easy art concept, think 
of the possibilities for creating 
coordinated decor for your home.


note: 
My project was photographed before 
giving it a final top coat seal with 
Mod Podge; resulting in a better 
photo without glare.


Do you enjoy creating 
your own home decor?


Want to see more of my
DIY projects?

Follow on Bloglovin
or click the
"Let's Connect"
tab at the top of
the page for more
options.


scroll down to see where I'll be sharing today's post.

May 22, 2015

From Cookies to Muddy Boots - DIY Drying Rack

My "About Me" page claims that I re-cycle, 
up-cycle and repurpose for the sheer joy of it. 

Here's my latest joy...

We've all seen the boot drying racks with 
pretty stones, rocks or pebbles in a pan on 
Pinterest, right?

So pretty, yes, however, every time you want 
to clean out all the accumulated mud & dirt you 
have to dump out all the stones, wash them and 
let them dry a bit before putting them back in the pan.

Not very practical for this country girl.

Recycle Cookie Baking Sheets, DIY Boot Drying Rack

I needed something I could rinse off  easily 
with my hose and put back in place before 
the muddy boots started arriving again!

So here's my solution; old cookie sheet, 
cooling rack and pretty spray paint.

The cooling rack is easy to rinse & dry and 
allows maximum air flow for muddy/wet boots.


Honestly, I did not over think this too much, 
so it was a really quick project. 
I did not "prepare" the baking sheets in any way 
prior to painting. We've been using them now for 
over two months. Works perfectly! 


Follow on Bloglovin

Have you used the pebble/stone drying racks?
Do they work for your family?


scroll down to see where I'll be sharing today's post.

Mar 23, 2015

DIY felt coasters - spring flowers


Happy Spring!
I wanted to be ready for the upcoming picnic season with a 
few hostess gifts. This is a super simple project.

DIY felt coaster supplies

I found a roll of thin cork at Goodwill for 97¢ and was inspired!
I ran it through my Cuttlebug along with some felt and created these fun flowers. I tried two different methods; cutting out the centers to fit into the flowers and just cutting out separate centers to adhere atop the solid flowers. Personally, I preferred the look of the latter.  All was adhered with spray adhesive.


Sweet!

easy DIY felt coaster


I'm hoping they'll bring a little smile to those who receive them.
Have a blessed day!


Follow on Bloglovin


DIY spring flower felt coasters


scroll down to see where I'll be sharing today's post.

Oct 13, 2014

Mirrored Vanity Tray - Recycle, Repurpose, Reuse

We recently gave our bedroom a major makeover 
and now I'm working on adding some pretty decor.

When we decluttered our home earlier this year, 
I boxed up a few items and challenged myself 
to recycle, repurpose or reuse them within the 
year in order for them not to be deemed 'clutter'! 

So, here's my first ready-to-see project: 
An old gold framed mirrored tray.

mirrored vanity tray - before

A bit of cleaning, a solid coat of black Krylon spray paint, 
and some Zva Creative bling...

a little mirror bling

...and here's my "new" mirrored vanity tray! 

mirrored vanity tray - reuse

Hubby made us his & her oak dressers; 
this tray will be sitting pretty atop mine!


I'll have more projects to show soon, 
along with the room makeover!

Follow on Bloglovin
♥ Follow Me On Bloglovin'

What's your latest 
recycle-repurpose-reuse project?


scroll down to see where I'm sharing today's post.

Sep 6, 2014

DIY Cake Plate - some assembly required

I've been wanting to create a pretty 
pedestal cake plate for the upcoming 
holidays for some time now. So at the 
beginning of yard sale season, it was on my list.


I found a lovely glass candle holder, it was 
a bit bigger and heavier than the regular 
ones I normally see, it was two dollars at a 
tag sale, perfect! 

DIY cake plate - some assembly required

With a little glue and a glass plate found at 
Goodwill, I was able to create this pretty piece!


It sparkles!

DIY cake plate

This is such an easy DIY, I encourage you 
to hunt down some glass pieces of your 
own and make one. 

Don't need another cake plate?  

Then stay tuned, I have a fun & unique way 
to use a pedestal plate as a really cute gift idea!


Follow on Bloglovin
♥ Follow Me On Bloglovin'


scroll down to see where I'm sharing today's post.

Aug 12, 2014

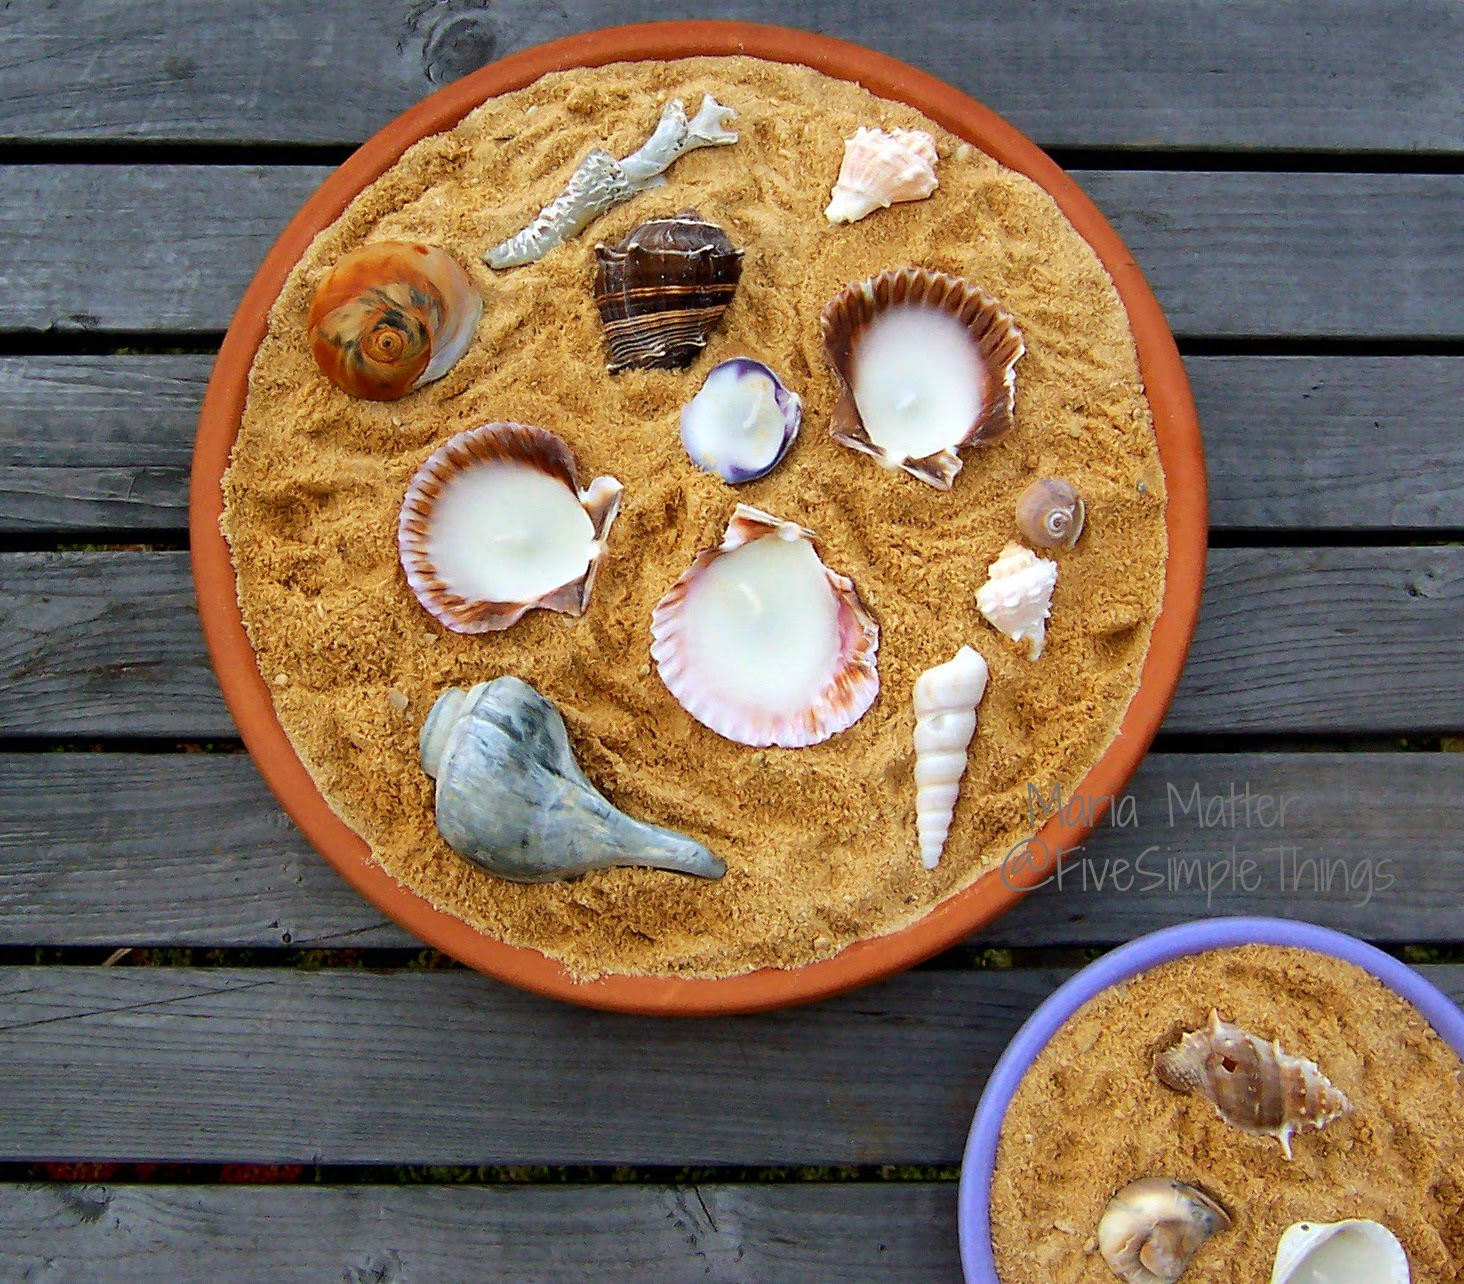
Seashell Candles


seashell candles


Do you collect seashells at the seashore?

seashells

Here's a fun idea to use some shells 
for your outdoor decor.


You'll need:
clam shells
wax 
wicks
clay pot saucer
sand 

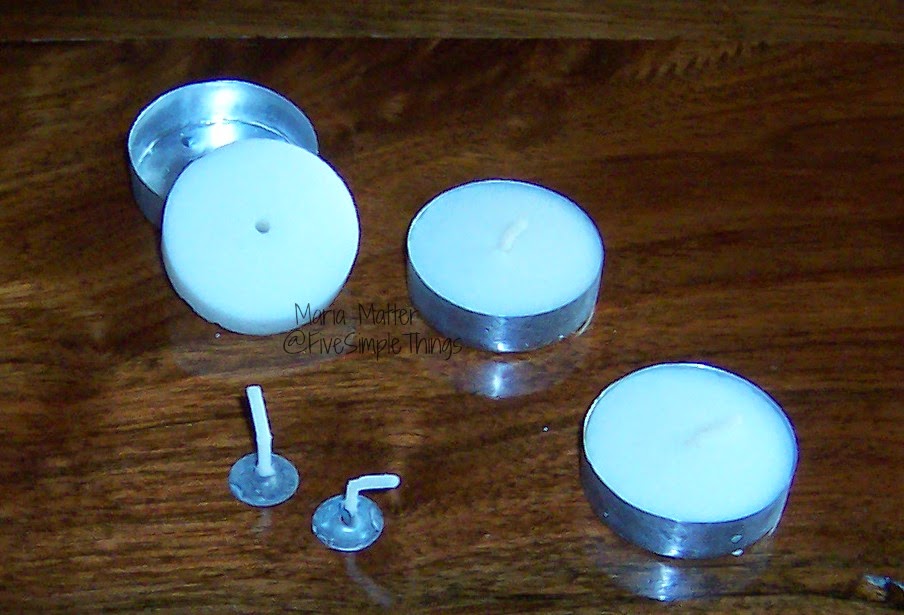
I used a pack of tea light candles that I picked up at a tag sale for .10 cents. 

tea light candles, wicks removed

The tea lights were my wax & wicks, the wicks have a tiny metal base and slip right out of the candle. Then I dropped the "wickless" candle into a tin can to melt on the side burner of my grill. 

When the wax was completely melted, I dipped the wicks into the liquid wax and placed them in my seashells to secure them. Next, in went the wax. They cooled in minutes.


saucers with seashell candles


I had more wax then shells so I poured the remaining wax in tin cupcake cups to use as wax melts for another craft at a later time!


wax melts


Simple outdoor decor!


Seashell candle outdoor decor

Do you collect souvenirs from your vacations?
How do you display them? 


Follow on Bloglovin
♥ Follow Me On Bloglovin'

scroll down to see where I'll be sharing today's post.
Jul 1, 2014

Recycle - wooden block flag - Americana Decor

Hello July!

Summer is in full swing this week,
with it's hot, hazy & humid weather.

As much as I enjoy this season for
gardening, I do not enjoy the heat!
So, for the next two months you will
find me cowering in the air-conditioned
house!

wooden block flag

If you're hiding in the cool air too, 
here's a quick & easy project to make!

A wooden block flag!

You'll need some wood scraps & paint!
I used 2x4's, a 4x4 block and Krylon spray paint.

Or have the kiddos join in 
with their brushes & paint!


wood scraps


These wooden scraps would have
gone into the kindling box for the 
winter if I hadn't rescued them!


wooden block flag 


I made extra white blocks 
to change it up a bit
throughout the seasons!

interchangeable blocks, wooden flag


I have so much fun seeing the 
potential in a piece of "trash" 
and turning it into a treasure!

Do you re-purpose your trash??


Follow on Bloglovin
♥ Follow Me On Bloglovin'


scroll down to see where I'm sharing today's post.