Showing posts with label The Kitchen. Show all posts

Sep 13, 2016

Preserving Fresh Lettuce - Salad from a jar


I'm a salad-lover!
I could eat a salad every day,
and I usually do.

Yet I'm always throwing away
lettuce that has turned brown or wilted.

note: I don't actually throw it in
the trash bin, it goes to the chickens/compost.

Well, no more!!
(cue dramatic "ta-da"music here)

Food saver, vacuuming sealing lettuce

I now preserve my lettuce in canning jars
with my handy dandy FoodSaver vacuum sealer.

We purchased jar sealers for both regular
and wide-mouth. These use the accessory 
hose that comes with most FoodSaver models.


Here's how we do it!

We use a mix of lettuce, whatever
we're growing along with store-
bought.

1. Chop it into bite-size pieces.

2. Wash and DRY it really well
     in your salad spinner or with
     paper towels.

3. Pack your mix of lettuce into 
    mason jars. Push in as much
    as you can!

4. Place a lid* on the jar.

5. Place the jar sealer over the lid.

6. Attach the hose to both the jar
    sealer and your machine, hit
    the vacuum button.

7. When it is finished, DETACH 
    the HOSE from the jar sealer 
    first. You should hear a ping.

8. Then remove the jar sealer from
    your mason jar. Test the lid to make
    sure its sealed!

9. Keep your jars in the refrigerator
    for up to seven days. 

That's it.


mason jars of salad, kitchen time savers, food saver, lettuce lasts longer


* you can use new lids (and still use them for canning later) or
you can reuse old lids as long as they aren't too banged up.

Also, this works for quart or pint jars. 
I use a pint because that is a perfect serving size for me.

We have been doing this for well over a year now. 
You can experiment with different lettuce. More delicate leaves/spinach, I know just starts to turn by the seventh day. However, more sturdy leaves such as romaine will last longer.


eat a salad, quick tips to eating healthy, canning lettuce

This is a huge time saver during the week. For lunch, I simply 
grab a jar, empty it onto my plate throw on a few toppings and 
I'm good to go!


I have a friend that takes a jar with her to work each day, she puts
her toppings in another container; grabs both on her way out the 
door. 


I'm all about prepping for one day,
so I can eat for a week.

Do you have any prepping shortcuts
to share??


scroll down to see where I'll be sharing today's post.

Aug 30, 2016

Easy Zucchini Cake with Cream Cheese Frosting - Printable Recipe


Last week I talked about my 
stockpiles of shredded zucchini!
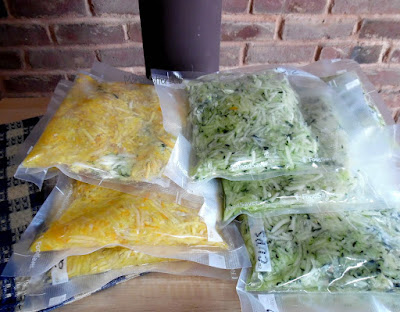
Food Saver bags of shredded zucchini

So, this week, I wanted to share one
of my favorite recipes to make with
that shredded goodness!  


easy zucchini cake with cream cheese frosting


Easy Zucchini Cake
with Cream Cheese Frosting


2½ cups  all purpose flour
2    cups  sugar
1½ teaspoons ground cinnamon
1    teaspoon  salt
½   teaspoon  baking powder
½   teaspoon  baking soda
1    cup     vegetable oil
4    eggs
2    cups   zucchini, shredded
½   cup    walnuts, chopped (optional)

directions:
1. Combine flour, sugar, cinnamon, salt, baking powder & baking soda in mixing      bowl
2. Combine oil & eggs; add to dry ingredients, mix well
3. Add zucchini; stir until thoroughly combined.
4. Fold in walnuts, if desired.
5. Pour batter into 13 in. x 9 in. x 2 in. baking pan.
Bake @ 350° for 35-40 minutes.


Frosting

4 ounces unsalted butter, softened
4 ounces cream cheese, softened
2 cups powdered sugar
1 teaspoon vanilla extract

directions:
In a large bowl, beat together the butter and cream cheese with an electric mixer. With the mixer on low speed, add the powdered sugar a cup at a time until smooth and creamy. Beat in vanilla extract. 


note:
If you're using your frozen shredded zucchini,
there may be quite a bit of liquid in the freezer bag
after thawing.
DO NOT DRAIN! The zucchini "juice" helps keep
this cake super moist!

using your frozen shredded zucchini to make cakes


Check out some of my other
 Zucchini recipes and ideas.


My pickiest eater actually requests 
this recipe for his official birthday cake!
Yea, it's that good!!
I hope you'll give it a try (:

Have a blessed day!


scroll down to see where I'll be sharing today's post.


Aug 23, 2016

Preserving Your Summer Squash - Zucchini

If you're someone who likes 
to share, grow summer squash. 
It's a very prolific plant!

homegrown zucchini

We grew green & golden 
zucchini summer squash 
this season. 

Unfortunately, we started
our garden a bit late due
to our May/June vacation
this year and it was just
when the squash "moths"
were laying their eggs.
We didn't notice in time,
and their larvae feasted
on our plants!
#sadface  :(


green and golden zucchini squash ready for the freezer


We were able to pick a few before
the vines started dying off.


Most of my zucchini is shredded,
preserved in FoodSaver bags and
stacked in the freezer for later use.

Although you can add shredded
zucchini to a number of recipes
to increase your veggie intake,
our main uses are...

*Zucchini Cake with Easy Cream Cheese Icing,
*Zesty Zucchini Relish.

I'll provide links above as I share my recipes here on the
blog in the coming days.

We use a food processor with
a shredder blade.

shredding side of a food processor blade

If you have a shredder for your
Kitchen-Aid mixer great, if not
a hand grater would work too!

Then we bag it up in 2 or 3 cup portions.
3 cups for the bread, 2 cups for the cake
and relish. Freeze it flat then stack it to
save space. No blanching required.

You could also slice your zucchini in
rounds and dehydrate it for use in soups
and casseroles.
Sprinkle on some seasonings before 
drying them for variety.


Whether you shred it, freeze it or 
dehydrate it, Zucchini is easy to 
preserve and a great veggie to keep 
on hand.

Now, I'm off to bake a zucchini cake!


Do you grow squash 
in your garden?

What is your favorite
way to use it?


scroll down to see where I'll be sharing today's post. 

Aug 2, 2016

Easy Melt & Pour Seashell Soaps


Ah, summertime...
sun, sand, beach, seashells...seashell soap! 

Why not!

It's a fun activity to do with the kids!


You'll need a melt & pour glycerin bar
and some seashell candy or soap molds
from your favorite craft store.

Then cut a few cubes from the bar and place
them in a glass bowl for melting.

Pop it in the microwave and heat it
for 30 seconds, stir. Continue heating
it at 30 sec. intervals until melted and
its easy to stir.

Separate the melted soap into different
glass bowls if you want to add color to
your soaps.

Once colored, you'll simply pour it into
your molds and let it sit overnight until
firm.

Then pop them out of the molds to use
or give as gifts.

Simple, huh?!

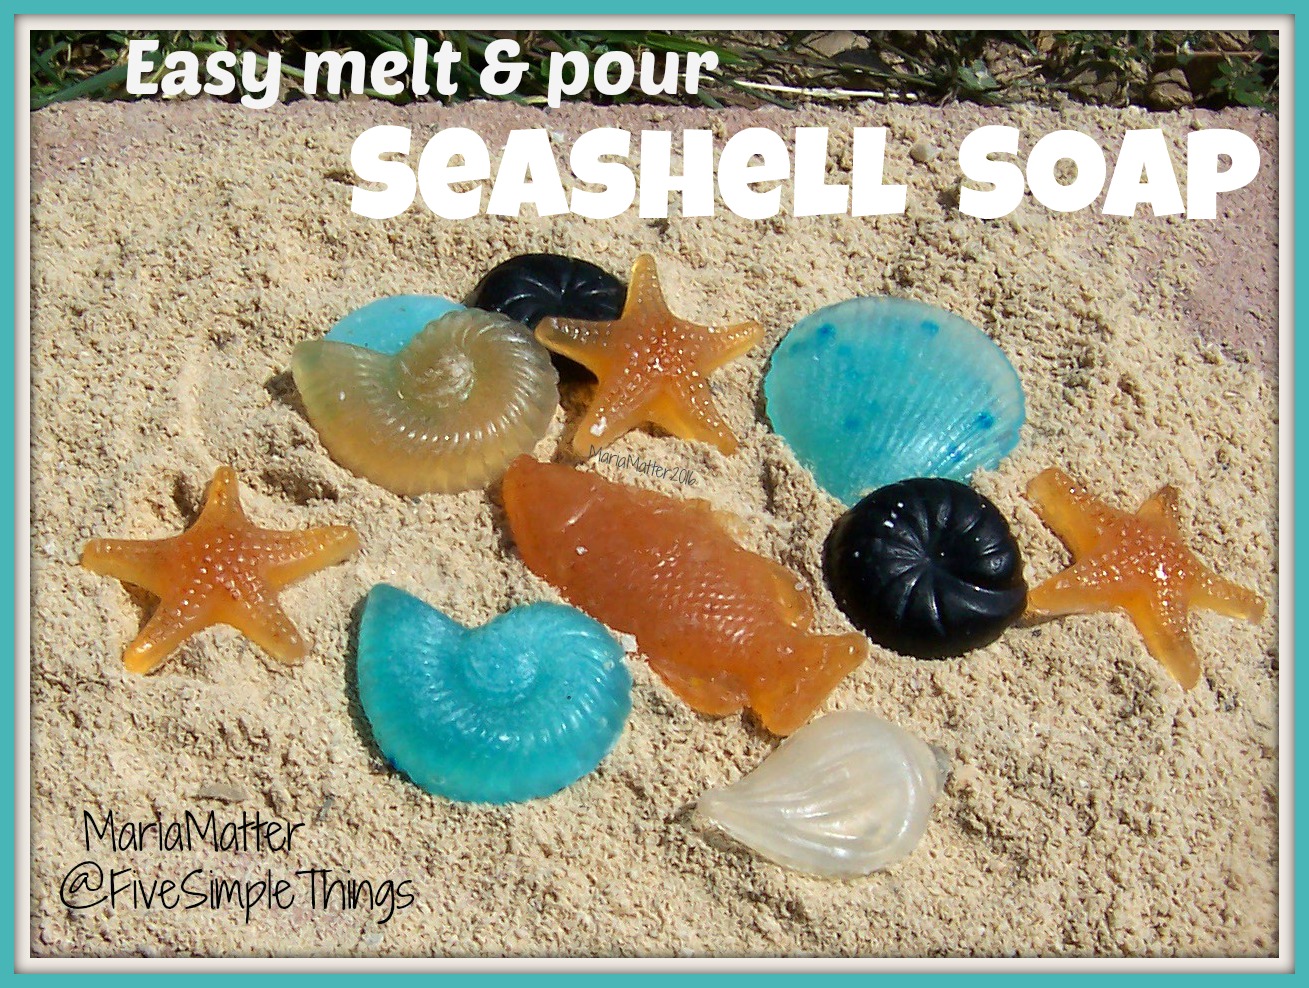
fish, seashell, starfish homemade soap


We used food to color our soaps;
brown sugar, paprika, dark cocoa and 
blue "Jello" powder.


Think of the possibilities...
depending on the molds and colors
you use; you can coordinate seasons,
holidays, sports, special events, etc.


side notes:
if you notice bubbles in your melted
glycerin soap-and they bother you-
you can put a little rubbing alcohol
in a spray bottle and lightly spray the
surface of the soap, the bubbles will
dissipate. 

Also, if you have older kids, this could be
a great fundraiser project. I've given
you the basic instructions, but you 
could get a little more involved by
purchasing soap fragrance and color
gels (a little goes a LONG way!) It can become 
rather addictive, be warned!

make custom made soap


Have you ever made
your own soap?


scroll down to see where I'll be sharing today's post.

May 18, 2016

Super Moist Zucchini Bread - printable recipe

I'm sharing a long-time family 
favorite recipe today!


zucchini bread


When our garden explodes with 
zucchini every summer, I work
feverishly to process it for the 
freezer. 

Shredding, measuring and bagging
it with my beloved Food Saver!

The uniformly bagged zucchini 
occupies a designated corner of 
our chest freezer to be used in a
variety of dishes throughout the 
year!


Easy Zucchini bread recipe
zucchini bread

Adding shredded zucchini to recipes 
is a great way to increase your veggie 
consumption as it doesn't have a 
strong individual flavor.

However, there are two main recipes 
in our home that quickly deplete my 
pretty little frozen piles; this super 
moist zucchini bread and our rather
sassy zucchini relish.

Both are well loved by adults, children
and assorted family & friends!

Today, I'll share our bread recipe...


Zucchini Bread

3 eggs
2 cups sugar
1 cup oil
3 cups zucchini, shredded
3 teaspoons vanilla extract
3 cups flour
1 teaspoon salt
1 teaspoon baking Soda
¼ teaspoon baking Powder
3 teaspoon cinnamon
1 cup raisins (optional)


1. Preheat oven 350 degrees (Fahrenheit)
2. Beat eggs until foamy
3. Add sugar, mix well
4. Add remaining ingredients, mix well.

Grease & flour 8-9 mini loaf pans, fill half full.
Bake @ 350° for 40-50 minutes.

~Maria Matter http://asimplefive.blogspot.com/


Zucchini bread recipe, easy to make

So delicious!
Be sure to pin it for this summer's
zucchini harvest!


Follow on Bloglovin


Are you a
Zucchini lover?


scroll down to see where I'll be sharing today's post.

May 12, 2016

Easy Crockpot Mushrooms with Ranch & Parmesan - 4 ingredients


A simple mushroom recipe!

steak and shrooms, green beans, easy recipes


I am a carnivore!
yep, I'm a red meat eater and 
if that red meat is in the form
of a steak, all the better...
and if that steak is topped with
savory mushrooms...well, that's the best!


Only 4 Ingredients


Simply combine the four 
ingredients in a crockpot for 
four hours then serve!


You can slice the mushrooms 
or leave them whole.
I used mushrooms I had 
processed and froze from
this past year and they were
actually still a bit frozen when 
I put them in the crockpot. 
So fresh or frozen, though 
fresh is just a bit better! (:


steak and mushrooms, Crockpot recipe mushroom, Parmesan cheese, ranch dressing mix

Here's the handy dandy recipe.

Crockpot Mushrooms

1 pound mushrooms
½ cup (1 stick) butter
1 ounce (6 tsp.) ranch dressing mix (powder)
2 Tbsp. parmesan cheese, grated

Cook 4 hours on high in Crockpot or until tender.

*note: if you're not using them immediately,
refrigerate in all their juices to reheat later.

Maria Matter 
http://asimplefive.blogspot.com/


Kraft Parmesan cheese, Hidden Valley Ranch dressing mix, Steak and mushrooms, slow cooker recipe


Delicious!

Like easy recipes?
Check out my 
board on Pinterest.

Follow on Bloglovin


scroll down to see where I'll be sharing today's post.

May 3, 2016

Giant Soft Sugar Cookies - Printable Recipe

Giant Soft Sugar Cookies...are there four sweeter words?!


Excluding chocolate chip cookies, these are my favorites!

We have a local grocery store that sells giant sugar cookies, 
six to a plastic box. When the kids were little, it would be a 
treat to buy a box so we each would get one giant cookie.

Then we found this recipe...and OH are they good...and soft! 


baking extra big extra soft sugar cookies


As you can see from the title, the cookies are to be made
giant, larger than your average cookie, but I promise the
cookie police will not show up at your door if you choose
to make them regular size. (:

They just seem a bit more special when you can fill up 
a plate with four cookies. 

huge, extra large, drop sugar cookies


Here's the handy dandy recipe!


Giant Soft Sugar Cookies

makes 24 cookies

1½ cups  sugar
 ¾  cups butter, melted
 2  eggs
 1  cup buttermilk*
 1  tsp vanilla
 3  cups flour
 dash of salt
 1  tsp baking soda
  coarse sugar for topping

Cream together sugar, butter & eggs
Add buttermilk, mix well.
Add vanilla, mix
Combine flour, salt & soda.
Add dry ingredients to bowl, mix well on LOW speed.
Drop large spoonfuls of batter on parchment papered
cookie sheets. 
Sprinkle with coarse sugar on cookies before baking.
Bake @ 350°  for 10 minutes.

Maria Matter @ http://asimplefive.blogspot.com/


*substitute buttermilk 
with 1 cup milk + 1 Tablespoon vinegar, 
let set for a few minutes before adding to
the recipe.  works great!

easy recipe for soft sugar cookies


Super easy to make, super easy to eat, and they share well!


What's your favorite 
cookie?


Follow on Bloglovin


scroll down to see where I'll be sharing today's post.

Apr 19, 2016

Cheesy Bacon Quiche - Printable Recipe


Quiche is one of my go-to meals!
And I have an easy one to share with you today.


a basic quiche recipe Cheddar Cheese and Bacon Quiche


      quiche: (keesh) 
              is an open-face pastry crust with a 
              filling of eggs and milk which, when
              baked, becomes a custard. It can be 
              made with vegetables, meat and seafood.

This definition tells me that as long as I have
milk and eggs, I can pretty much dump any
thing else I have in a pie crust and have 
dinner on the table in about 30 minutes!

That's a winner in my book.

And the fact that you can "customize"
your quiche for your family puts this
meal over the top!


Today's recipe is a very basic one, you could 
switch out the bacon for any meat or seafood
and use any cheese that compliments the 
protein you chose.
OR
Use whatever you have on hand; leftovers
work great!


chopping bacon for quiche


My hubby likes to make a big breakfast for the family
over the weekend; bacon, eggs, pancakes and french
toast. Its a regular breakfast bar. 

So this past weekend, I asked him to make some extra
bacon so I could make quiche this week.

Well, you would have thought I spoke in a foreign 
language, both my son & hubby cocked their 
heads and in unison said, "There is no such
thing as "extra" bacon!"

Ooookay!

So I just bagged some up before bringing it 
to the breakfast table and no one even noticed.

This quiche starts simply by putting your pie
crust in the pie plate. Homemade crust or
store bought, both work fine.


add bacon and shredded cheddar to pie crust

Feel free to make a pretty crimped edge,
I just throw my store bought crust in this
time and didn't worry about the pretty part.

Then toss gently place your bacon and 
shredded cheese in the crust.

Beat your eggs, milk, salt and pepper together
and pour it into the crust.


cut piece of baked cheesy bacon quiche

Pop it in the oven and in about 30 minutes you'll
be enjoying a yummy meal with your family.

It's that easy!


have a piece cheesy bacon quiche

Here's the handy dandy printable recipe.
I hope you'll give it a try.

Blessings!


Cheesy Bacon Quiche
(printable recipe)


Pastry for 9 inch pie
5-6 stripes of bacon, cooked and crumbled/chopped
1 cup (4 ounces) shredded cheddar cheese
1 teaspoon salt
½ teaspoon ground black pepper
4 large eggs, beaten
1½ cup  milk

Directions:
1. Preheat oven, 375 degrees
2. Fit pie crust into pie plate, fold ends under and crimp.
3. Spread shredded cheese and bacon evenly in pie crust.
4. Beat salt, pepper, eggs and milk until well blended,
5. Pour over cheese and bacon in pie plate.

Bake 30-40 minutes or until set. Let stand 5 minutes before serving.

yield: 6 servings

Maria Matter http://asimplefive.blogspot.com/


quiche recipe


If you like this recipe,
be sure to check out my
Sausage Cheddar Quiche
it's a bit more spicy!

What's your go-to meal?


Follow on Bloglovin


scroll down to see where I'll be sharing today's post.